Quick Summary
- Yapp explains how to write an event brief that keeps teams aligned on goals, audience, logistics, and execution.
- A strong brief reduces confusion, speeds up planning, and gives stakeholders one clear source of truth.
- Event planners, marketers, and internal teams managing complex events should use this step-by-step guide.
If you’re an event planner, you’ve probably asked yourself the same question after every event: “How can I make the next one even better?” The truth is, successful events don’t start with venues or budgets — they start with a well-structured event brief.
An event brief is more than paperwork. It’s your playbook for aligning stakeholders, clarifying objectives, and ensuring every detail is designed to deliver results. Whether you’re planning a conference, a trade show, or an appreciation gala, a strong brief helps you save time, cut costs, and boost attendee engagement.
What is an Event Brief?
An event brief is a document that contains all the essential information about an event. It is a tool that can be used by event planners to ensure that they are on the same page with their clients and to make sure that they are aware of all the essential details that need to be considered when planning an event.
For instance, if you’re planning a conference, you would want to include information about the topics covered and the speakers presenting. This document is a reference for everyone involved in the event’s planning process, from the organizers to the vendors.
Why is an Event Brief Important?
Here are some of the critical benefits of having an event brief:
- Optimize Tracking: By clearly understanding the event’s goals, you can more accurately measure its success. For instance, if your objective is to generate brand awareness, you want to track metrics like social media engagement and website traffic.
- Improve Communication: A detailed event brief enables all stakeholders –– from the venue staff to the marketing team –– to be on the same page. This can help prevent misunderstandings and miscommunication.
- Save Time and Money: By being clear about your event’s goals, you can avoid wasting time and money on unnecessary details. For instance, if you’re planning a small intimate gathering, there’s no need to book a large venue or hire a celebrity MC.
Now that you know the importance of an event brief let’s look at how to write one.
Step-by-Step Guide for Writing an Event Brief
Below are the key steps for writing an event brief.
Step 1: Provide an Event Overview
The first step is to provide a general overview of the event. This should include the name, date, time, and location. It would be best if you also briefly described the event, such as its purpose or theme.

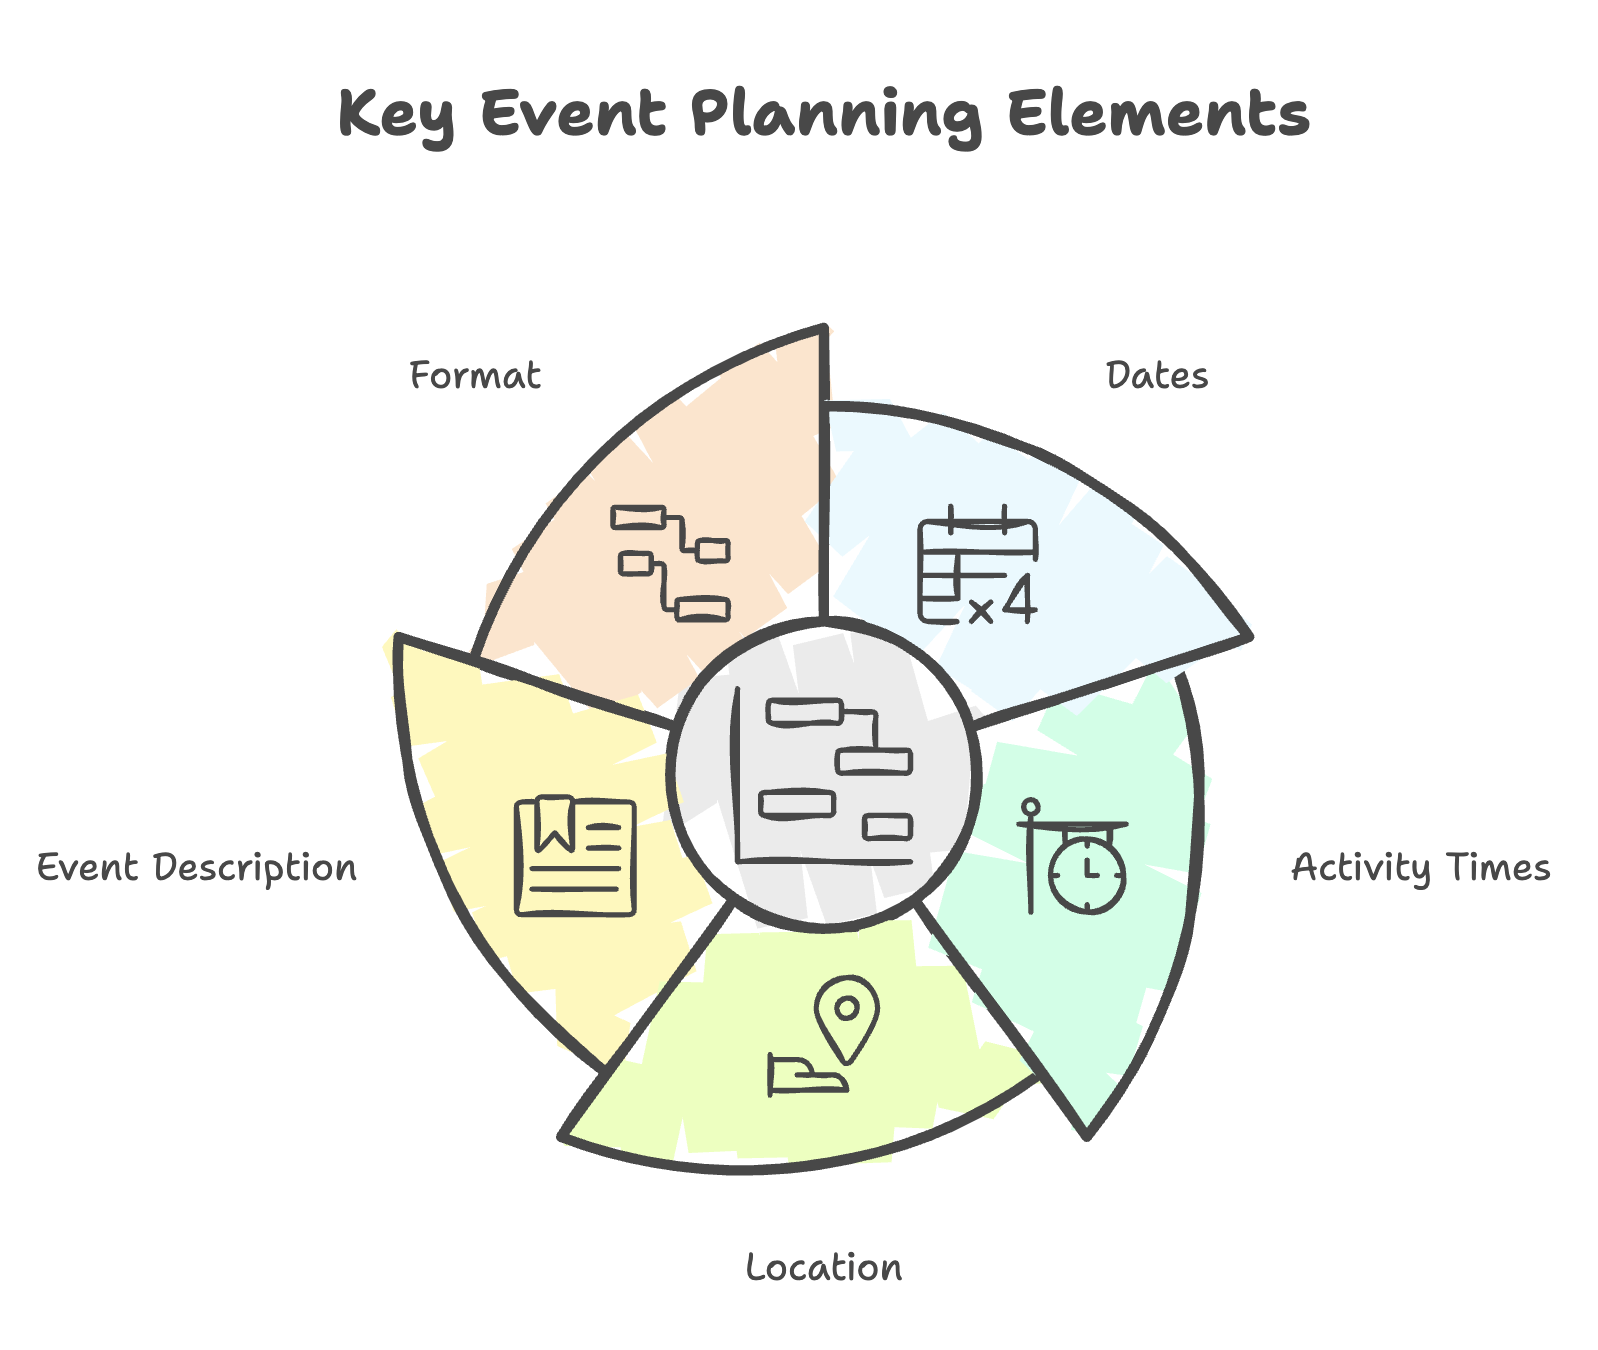
Here is the essential information you’ll need to include in the overview:
- Event name
- Dates
- Activity times
- Location
- Event Description
- Format
Step 2. Define the Objective
Ask yourself, what is the purpose of the event? Is it to generate leads, drive sales, or build brand awareness? Once you’ve identified the main objective, you can start aligning all the other event elements around it.
Define the objective as clearly as possible. Here are some examples:
- Meet and network with our community of stakeholders, including clients, prospects, and partners.
- Educate customers on a significant new product launch or brand change.
- Generate sales for our annual holiday promotion.
- Acquire new customers in our market.
Step 3. Identify the Target Audience
Who is this event for? Is it for existing customers, new prospects, or partners? The answer to this question will dictate the event’s tone, messaging, and overall experience.
For instance, if you’re planning a conference for C-level executives, you want to ensure the venue is upscale and the topics are relevant to their needs. On the other hand, if you’re planning a customer appreciation event, you want to ensure it’s fun and interactive.
Be as specific as possible when identifying the target audience. Here are some examples:
- College students who are interested in starting their own business.
- Working professionals in the industry who are looking for a new job.
- Stay-at-home parents who are interested in earning an income from home.
Step 4. Set the Tone
What kind of feeling do you want your guests to have when they leave the event? This is what we call the event’s “tone.” The tone should align with the event’s objective and target audience.
For instance, if you’re planning a conference for industry thought-leaders, you would want the tone to be professional and informative. On the other hand, if you’re planning a customer appreciation event, you would want the tone to be fun and festive.
Some examples of event tones include:
- Intimate and exclusive
- Fun and festive
- Professional and informative
- Luxurious and extravagant
Step 5. Choose the Type of Event
There are many different types of events, but some of the most popular ones include conferences, conventions, trade shows, and exhibitions. Events can also be classified by their size, such as small (under 100 people), medium (100-1,000 people), or large (over 1,000 people).
Here are some examples of event types:
- Conference: A gathering of people to discuss a particular topic or share information.
- Convention: A large gathering of people centered around a shared interest, goal, or industry.
- Trade Show: An event where businesses showcase their products or services to potential customers.
- Exhibition: A public event where businesses display their goods or services for the first time to generate awareness.
The type of event will depend on the goals, target audience, and budget. For instance, a trade show might be the best option if you’re trying to generate sales. If you’re trying to build brand awareness, then an exhibition might be the better choice.
Step 6. Choose the Date and Location
The date and location of the event are two of the most important factors to consider. The date should be chosen based on the availability of the venue, the target audience, and the event’s objective. For instance, a date near the holiday season might be the best option if you’re trying to generate sales.
The location should be chosen based on the type of event, the target audience, and the budget. For instance, a city with a strong business presence would be the best choice if you’re planning a conference for industry thought-leaders.
Step 7. Set Roles and Responsibilities for the Team
Now that you have the basics of the event planned, it’s time to start putting together a team to help make it happen.
Depending on the size and scope of the event, you might need to hire an outside company to help with logistics. You will also need to decide who will be responsible for marketing, budgeting, and customer service tasks.
Many different roles must be filled to successfully plan and execute an event. Here are some of the most important ones:
- Event planner: The event manager is usually the first point of contact for the client or customer. They are responsible for developing the event concept, setting the budget, and managing the logistics.
- Event coordinator: The event coordinator works closely with the event planner to ensure that all event details are taken care of. They are responsible for booking the venue, arranging transportation, and ordering supplies.
- Event marketing manager: The event marketing manager is responsible for promoting the event to the target audience. They develop and implement marketing plans, create promotional materials, and manage social media campaigns.
- Event sales manager: The event sales manager is responsible for generating revenue for the event. They sell tickets, sponsorships, and exhibitor space.
- Customer service manager: The customer service manager is responsible for ensuring attendees have a positive experience at the event. They manage customer inquiries, resolve complaints, and provide information about the event.
Depending on the size of your organization and your budget, one person may assume more than one of these roles, or even all of them.
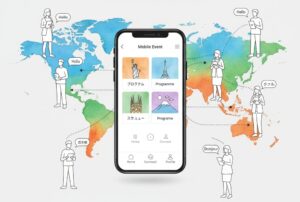
Step 8. Selecting the Right Event Mobile App
Deciding on the right mobile event app for your event can be daunting. With so many different options on the market, it’s essential to take the time to consider your needs and find an app that will fit both your event and your attendees. Some things to keep in mind include:
- The app should be easy to use and navigate. Attendees should be able to find the information they need without difficulty.
- The app should be compatible with multiple devices (IOS and Android). Not everyone uses the same type of phone, so it’s essential to choose an app that as many people can access as possible.
- The app should offer features that are relevant to your event. For example, if you’re hosting a conference, you’ll want an app that allows attendees to create their own schedule, view speaker bios, and read up on sponsors.
- The app should be updated regularly. With new versions of iOS and Android released every year, you will need to ensure your app is always up-to-date. Otherwise, attendees may not be able to access it on their latest phone or tablet. By keeping these things in mind, you can be sure to choose the suitable event mobile app for your needs.
Step 9. Create a Minute-by-Minute Update of the Event
This is one of the key ways conference apps streamline event operations and reduce confusion during live events. It should include all the required details, such as the start and end time, the location, the speakers, and the activities.
The schedule should also be updated regularly so that attendees can stay up-to-date on the latest information.
Here is an example of an event schedule:
- 9:00 am – Registration and Breakfast
- 10:00 am – Opening Keynote
- 11:00 am – Breakout Session 1
- 12:00 pm – Lunch
- 1:00 pm – Breakout Session 2
- 2:00 pm – Breakout Session 3
- 3:00 pm – Breakout Session 4
- 4:00 pm – Closing Keynote
- 5:00 pm – Networking Reception
- 6:00 pm – Event Ends
Step 10. Develop a Marketing Plan
Remember that organizing an event is not just about logistics but promoting it to the right audience. The marketing plan should be developed based on the objectives of the event, the target audience, and the budget.
The marketing plan should include a mix of traditional and digital marketing tactics, such as print advertisements, online ads, email marketing, and social media.
Here are some examples of a marketing plan:
- Print ads in local newspapers and magazines
- Online ads on event websites and social media
- Email marketing to potential attendees and past participants
- Social media campaigns on Facebook, Twitter, and Instagram
- Direct mail to potential attendees in the target area
Step 11. Keep an Updated To-Do List
Organizing an event can be a logistical nightmare. There are many details to keep track of, from the venue to the catering and marketing. Keeping an updated to-do list is essential to ensure that nothing is forgotten.
The planning checklist should be updated regularly and shared with the event team, so that everyone is on the same page.
Here is an example of a to-do list:
- Confirm venue booking
- Order catering
- Create event website
- Print promotional materials
- Ship event supplies to the venue
- Coordinate with volunteers
- Finalize speaker lineup
Organize Your Event and Improve Attendee Engagement with Yapp
Each event comes with its own unique set of challenges. But with the right tools and execution, any event can be a success. This is where Yapp comes in.
With Yapp, you can easily create a custom event app without coding. Attendees can use the app to stay up-to-date on the latest information and interact with other attendees. You can use it to keep everyone up-to-date via push notifications. For larger events, you can even create a second smaller app to be used by your organizing team to coordinate the behind the scenes details and logistics needed to make the event a seamless success!
Get started with Yapp‘s free trial today to make your next event a success!